Topics in this section include:
Instructor Types That You Can Add
Adding a New Instructor Overview
Adding a Shared Instructor Overview
Adding and Validating Instructor Credentials
Printing a Digital Instructor Authorization Card
Changing an Instructor’s Status
Removing an Instructor’s Affiliation from your Training Center
Reauthorizing Instructors Overview
Reauthorizing Instructor Options
Reauthorizing Instructors who are Up to 90 Days Past Due
Reauthorizing Instructors who are 91 to 365 Days Past Due
Assigning Digital Rights to Instructors
Affiliating an Instructor to your Training Center
Instructor Types That You Can Add
There are two instructor types that you can add to the system:
•New instructors, who are instructors that have never taught for your training center.
To familiarize yourself with the adding a new instructor process, see Adding a New Instructor Overview.
•Shared instructors, who are affiliated with another training center but are invited to teach for your training center. Once they are added, the system identifies them on rosters for any courses they teach, and their name and registry numbers display on Digital Certification cards.
To familiarize yourself with this process, see Adding a Shared Instructor Overview.
Adding a New Instructor Overview
Adding a new instructor is a two-step process.
1Start with Adding a New Instructor, where you identify the type of instructor that you are adding (New/Shared), provide the number of instructors you are adding, and supply payment details.
2Next, see Adding and Validating Instructor Credentials, where you provide instructor contact information, identify instructor credentials, and substantiate the information you provided. Once you finish with this process, you can assign the instructors to the courses that they are qualified to teach. This process is also use to update current instructor credentials.
Note If you need to generate a quote to get organizational approval before you can add a new instructor, perform Steps 1 through 10 in Adding a New Instructor. In the lower portion of the Payment Details section of the Cart Details window, click the Save Quote button.
To begin adding new instructors, see Adding a New Instructor.
Adding a Shared Instructor Overview
Adding a shared instructor involves:
•Selecting the shared instructor radio button and then providing the instructor’s registry number.
After confirming your input, the instructor is notified by email about the request, and you can immediately begin assigning them as an instructor for courses that they are qualified to teach.
To begin adding a shared instructor, see Adding a Shared Instructor.
Adding a New Instructor
Adding an instructor is a two-part process, where you:
1Purchase the instructor(s) authorization. Proceed to Step 1, below.
2Attest to the instructor’s credentials. See Adding and Validating Instructor Credentials after you complete Adding a New Instructor.
Note Have payment information (credit card, purchase order number) available before proceeding.
Step 1Choose INSTRUCTORS > MANAGE INSTRUCTORS from the navigation pane.
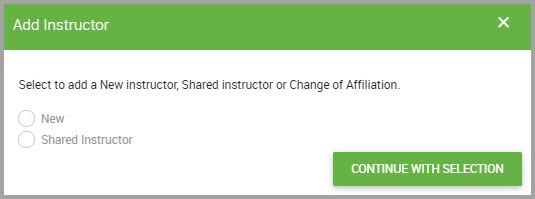
Step 2Click +ADD INSTRUCTOR.
Step 3Click the New radio button.
Step 4Click CONTINUE WITH SELECTION.
Step 5Enter the number of instructors you want to add.
The system refreshes and displays the content(s) of your shopping cart.
Step 7Click Continue Checkout.
Step 8Read the Purchase Agreement and when you finish, click ACCEPT.
Step 9(Optional) If you have a Promotional Code, enter it now, and then click Apply.
The Payment Details section displays several payment methods that you can choose from.
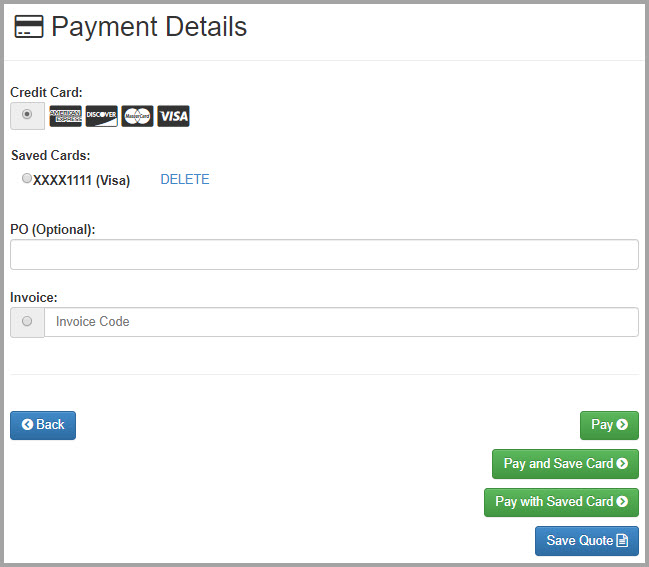
Step 10 Decide on your payment method:
•Paying with a new credit card number. See To Pay Using a New Credit Card.
•Paying with a credit card that is saved to the system. See To Pay using a Saved Credit Card.
•You can pay with a purchase order number. See To Pay using a Purchase Order
Note If you need to save your shopping details as a quote to obtain purchasing approval from your organization, click Save Quote.
To Pay Using a New Credit Card
•Select the Credit Card radio button.

Note You can use the PO (Optional) field to include details that your accounting department may need to reference the payment with.
(a)Perform one of the following:
•To save the card information to the system, click Pay and Save Card. Continue to Step (b).
•To pay with the new card but you don’t want to save its information, click Pay. Continue to Step (b).
(b)Fill out your credit card details in the Card Information dialog box.
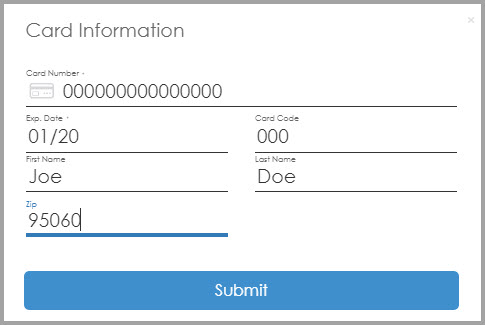
(c)Click Submit.
(d)Continue to Step 11.
To Pay using a Saved Credit Card
(a)Under the Saved Cards section, click the radio button for the saved card you want to use.
Note You can use the PO (Optional) field to include details that your accounting department may need to reference the payment with.
(b)Click Pay with Saved Card.
(c)Continue to Step 11.
(a)Enter the purchase order number in the Invoice field.
(b)Provide any additional info in the PO (Optional) field. You must add details to this field.
(c)Click Process Order. Continue to Step 11.
Step 11 Acknowledge the message by clicking Okay.
Your order summary displays with details of your order.
Your next step is to provide additional information about the instructor, and the Instructor Authorization page is where you provide and attest to the instructor’s training credentials. This page must be completed before the new instructor’s name is assimilated by the system and available as an instructor choice when you build courses. Continue to Step 13 if you want to perform this procedure now.
Step 12 (Optional) If you want to add the add and validate instructor credentials at later time, click the X at the top of the Shopping Cart Details page to return to the Otis portal. You are finished with these initial steps
Step 13 Click Return to the Instructor Authorization Page.
Step 14 Find the new instructors information and in their row click CONTINUE WITH APPLICATION.
Step 15 Continue by performing Adding and Validating Instructor Credentials, beginning with Step 3.
Next Step:
Adding and Validating Instructor Credentials
Adding and Validating Instructor Credentials
Use this procedure to update a trainer’s credentials. This procedure is also required after Adding a New Instructor.
Step 1Select INSTRUCTORS > MANAGE INSTRUCTORS from the navigation pane.
Step 2Find the name of the instructor in the Manage Instructors window and in their row, click CONTINUE WITH APPLICATION.
Step 3Enter Instructor Information for the following fields:
Note Fields accompanied with an asterisk (*) requires input.
•Select a Brand* from the drop-down menu.
The rest of the fields are populated from the information derived during the Adding a New Instructor process. You can make any necessary modifications for the following steps.
•Ensure the following fields contain accurate information; otherwise, provide correct information:
—First Name*
—Last Name*
—Make sure their Email Address* is complete
—Phone*
—Address*
—(Optional) If you need to include a building name or suite number, do so in the Address 2 field.
—City*
—State*
—Zip*
—Country*
Step 4Click SAVE.
Step 5Click the Select Instructor Credentials header.
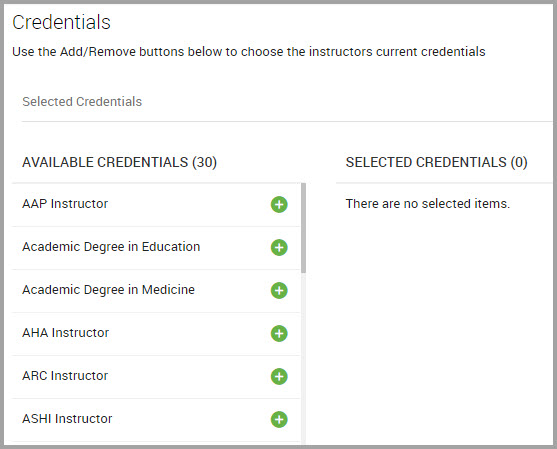
Step 6(Optional) Enter key words in the Selected Credentials field to narrow credential results shown in the window. As you enter terms, results matching your input auto-display as you type.

Step 7Select credentials by clicking on the green plus sign shown in the credential’s row.
The credential moves below the SELECTED CREDENTIALS column.
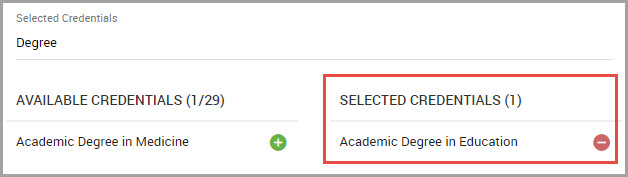
Note To move a credential from beneath the SELECTED CREDENTIALS column back to beneath the AVAILABLE CREDENTIALS column, click the credential’s red minus sign icon.
Step 8After finishing adding instructor credentials, click Select Certifications, Qualifications, Licenses.
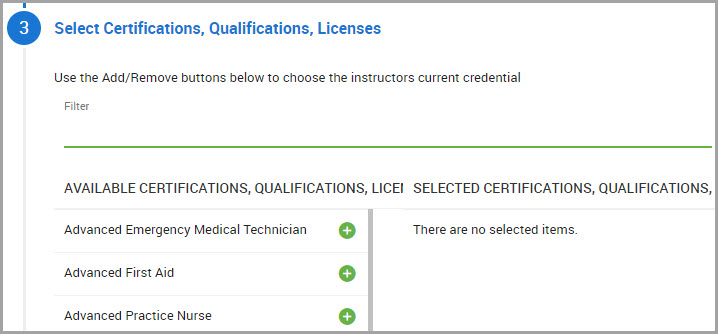
Step 9(Optional) You can refine the number of certifications selections shown in the window by entering key words relating to the certifications or qualifications in the Filter field.

Step 10 Select certifications by clicking on the green plus sign shown in the certification’s row.
The certification moves below the SELECTED CREDENTIALS column.
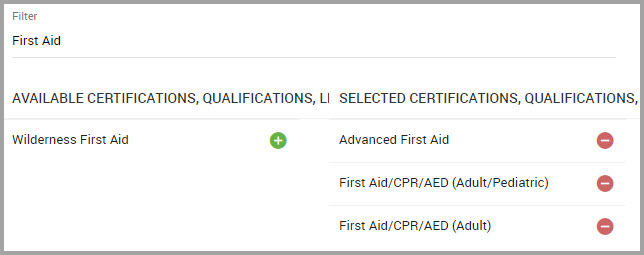
Note To remove a certification from beneath the SELECTED CERTIFICATIONS column back to beneath the AVAILABLE CERTIFICATIONS column, click its red minus sign icon.
Step 11 After finishing entering certifications, click Training Center Director Attestation.
Step 12 Read each sentence and click inside either the Yes or No radio button for all sentences.
Step 13 Click Review & Finalize.
Step 14 Review all the information shown in the window.
Step 15 (Optional) If you need to make any modifications, click the BACK button until you reach the correct window. When you finish, click Review & Finalize.
Step 16 When you are satisfied with the information, click FINISH.
Adding a Shared Instructor
A shared instructor is someone who is not associated with your training center. You can add them as a shared instructor which:
•Identifies them on rosters for any courses they teach
•Displays their name and registry numbers on Digital Certification Cards that are produced for students.
Note Shared instructor details cannot be edited by the training center, nor can the training center provide them their digital certification card.
Step 1Perform Steps 1 and 2 in Adding a New Instructor.
Step 2Click the Shared Instructor radio button.
Step 3Click CONTINUE WITH SELECTION.
Step 4 Enter the Instructor Registry Number*.
Step 5Click VALIDATE.
One of two messages displays:
•If the instructor is located, CONFIRM the request to complete this procedure.
This instructor can now be found in the system as you build a course, with an S next to their name identifying them as shared.
•If the instructor is not located, the system displays a message that an instructor with that registry number is not found, and to try again.
Searching for an Instructor
Step 1Choose INSTRUCTORS > MANAGE INSTRUCTORS in the navigation pane.
Step 2In the upper portion of the Manage Instructors window, and keeping the Basic Search radio button selected, make selections from the search filters shown below.
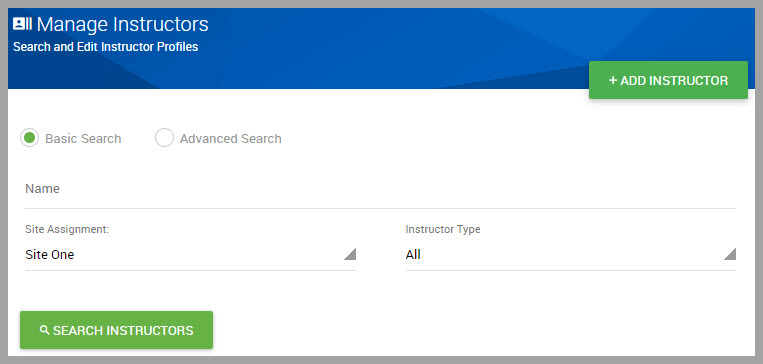
Step 3(Optional) For additional search filters, click the Advanced Search radio button to reveal additional fields, shown below.
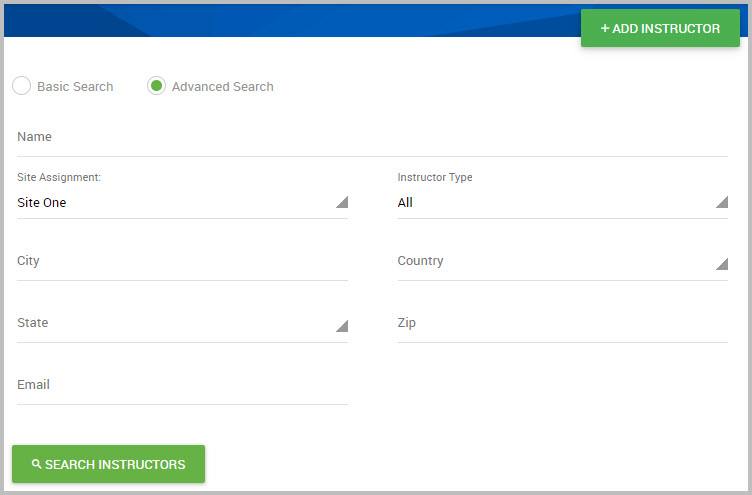
Step 4After making a selection or providing input for at least one filter, click SEARCH INSTRUCTORS.
Printing a Digital Instructor Authorization Card
We recommend that you print your digital instructor authorization card in the event that an organization wants to verify that you are a current and valid instructor.
Step 1Choose INSTRUCTORS > MANAGE INSTRUCTORS from the navigation pane.
Step 2Find the NAME in the Manage Instructors window. Alternatively, you can perform a search. See Searching for an Instructor.
Step 3In the instructor’s row, click the Digital Instructor Authorization Card icon.
Our welcome letter to you displays and describes a few of the features available in the portal.
Step 4Click the Print icon shown at the top of the window, and is shown in the following image (C).

You can also download the letter and card to your system by clicking B.
If you want to rotate the page clockwise, click A.
Changing an Instructor’s Status
You can change the following instructor status options:
•Upgrade their authorization.
This option does not include renewals or G2015 updates.
•Upgrade to instructor trainer.
•Remove an instructor’s affiliation from your training center.
Note Have your payment information (credit card/purchase order number) available before proceeding.
Step 1Choose INSTRUCTORS > MANAGE INSTRUCTORS from the navigation pane.
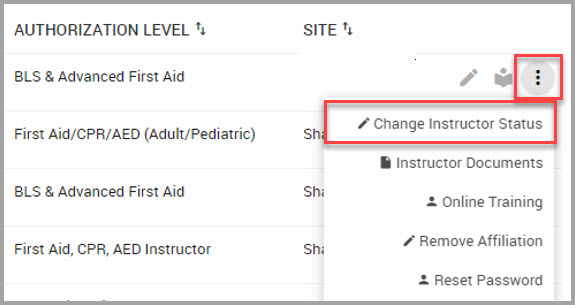
Step 2Find the instructors name in the window and in their row, click the Additional Actions icon and then click Change Instructor Status.
Step 3In the next page, click the radio button of the status you want to designate to the instructor.
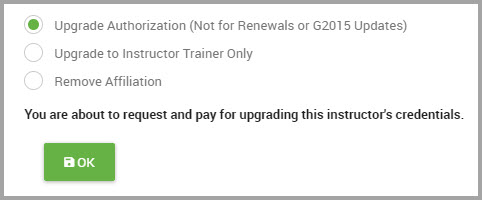
Step 4Click OK.
Step 5Click the X at the top-right of the page to close.
The screen refreshes and displays the Store’s shopping cart details.
Step 6Click Continue Checkout.
Step 7See Adding a New Instructor and perform Step 8 onwards to complete the checkout process.
Removing an Instructor’s Affiliation from your Training Center
Remove an instructor’s affiliation with your training center when:
•The instructor’s certification expires
•The instructor no longer teaches at your training center
Note Instructor information is still accessible by the training center even though their affiliation with it ceases.
Step 1Choose INSTRUCTORS > MANAGE INSTRUCTORS from the navigation pane.
Step 2Find the instructor’s name and in their row, click the Additional Actions icon, and then click Remove Affiliation.
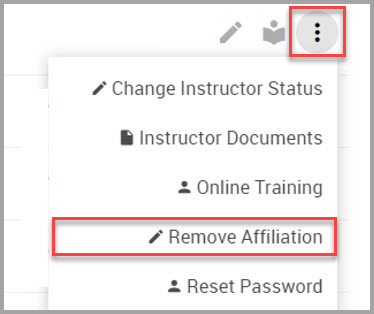
Step 3In the next window, click the Remove Affiliation radio button.
Step 4Click OK.
Step 5Click YES to confirm the action.
Reauthorizing Instructors Overview
ASHI and MEDIC First Aid instructors and instructor trainers are authorized by two methods:
•Successful completion of an instructor or instructor trainer development course (IDC/ITDC).
•Via reciprocity.
Note See “Authorization Methods,” located in the “Training Center Guidelines” section of the Training Center Administrative Manual (TCAM) to learn more about IDC/ITDC and Reciprocity.
An authorized instructor or instructor trainer who has met the minimum teaching requirements for reauthorization during their two-year authorization period is allowed a maximum grace period of 90 days past the expiration date of their authorization to reauthorize.
This grace period does not extend the authorization period, and instructors or instructor trainers with an expired authorization may not legitimately issue ASHI or MEDIC First Aid certification cards.
Note Reauthorization is the responsibility of the training center and/or instructor or instructor trainer. Refer to the Terms and Conditions for Instructor or Instructor Trainer Reauthorization section of the Training Center Administrative Manual (TCAM) for additional information.
Reauthorizing Instructor Options
There are three options for reauthorizing instructors or instructor trainers:
•Reauthorizing Instructors who are Up to 90 days Past Due—See Reauthorizing Instructors who are Up to 90 Days Past Due for step procedures.
•Reauthorizing Instructors who are 91 to 365 days Past Due—Requires that instructors requalify prior to reauthorization. See Reauthorizing Instructors who are 91 to 365 Days Past Due for step procedures.
Note The topic Reauthorizing Instructors who are over 365 days Past Due is publishing soon.
Reauthorizing Instructors who are Up to 90 Days Past Due
Note Have payment information (credit card, purchase order number) available before proceeding.
Step 1Choose INSTRUCTORS > REAUTHORIZE INSTRUCTORS from the navigation pane.
Step 2Read the information in the Reauthorize Instructors window.
Note Fields accompanies by an asterisk (*) requires input.
Step 3Click Select a Group of Instructors to Reauthorize*, and choose Up to 90 Days Past Due.
Step 4Click SEARCH.
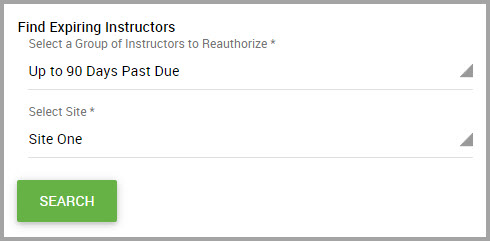
Step 5Click Select Site*, and choose a site from the drop-down menu.
Step 6Click SEARCH.
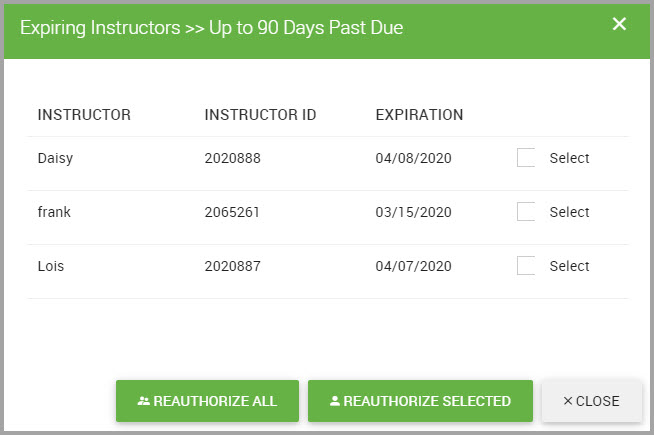
Step 7Decide the instructor(s) you want to reauthorize:
•To select individual instructors, click inside the Select check box for each instructor that you want to reauthorize, and then click REAUTHORIZE SELECTED.
•Click REAUTHORIZE ALL to select every instructor shown in the dialog box.
The Store’s Shopping Cart Details window displays.
Step 8To complete the purchase, see Adding a New Instructor, and follow Steps 7 through 13 to complete the reauthorization process.
Reauthorizing Instructors who are 91 to 365 Days Past Due
Instructors whose authorization expired 90 days or more must requalify prior to reauthorizing. Re-qualification is accomplished by:
•Successful completion of the HSI Emergency Care Instructor Re-qualification Course online, or
•By presenting other, current and acceptable teaching and provider credentials (known as reciprocity)
Note Have payment information (credit card, purchase order number) available before proceeding.
Step 1Choose INSTRUCTORS > REAUTHORIZE INSTRUCTORS from the navigation pane.
Step 2Read the information in the Reauthorize Instructors window.
Note Fields accompanied by an asterisk (*) requires input.
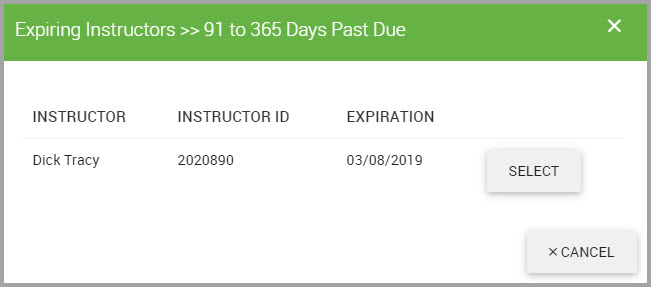
Step 3Click Find Expiring Instructors* and choose 91 to 365 Days Past Due.
Step 4Click SEARCH.
Step 5Click SELECT for the instructor you want to reauthorize.
Step 6Choose one of the following options:
•Reauthorize by using your current AHA, ARC, or other qualified credentials
This selection prompts the display of your email address in the dialog box. You can modify the email address, if needed. Proceed to Step 7.
or
•I don’t have current qualified credentials and will take the Requalification course to gain Reauthorization
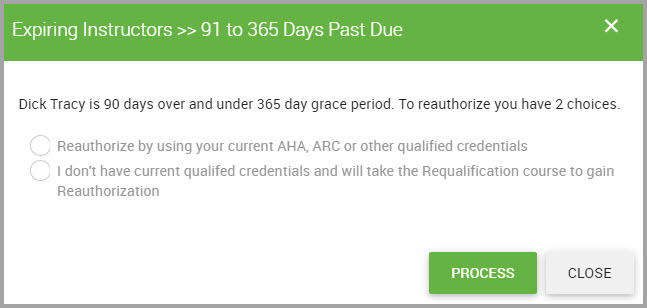
Step 7Click PROCESS. The HSI Store’s Check Out / Cart Details window displays.
Step 8To complete the purchase, see Adding a New Instructor, and follow Steps 7 through 13 to complete the reauthorization process.
Note The topic Reauthorizing Instructors who are over 365 days Past Due is publishing soon.
Assigning Digital Rights to Instructors
For instructors to be able to access video programs, training center directors must assign digital rights to instructors for the programs the instructors are authorized to teach.
Step 1Choose INSTRUCTORS > DIGITAL RIGHTS MANAGEMENT in the navigation pane.
Step 2In the Digital Rights Management window:
•Select the instructor’s Site the instructor is assigned to from the drop-down menu.
•Choose the Digital Resources program you want to provide instructors from the drop-down menu.
The window refreshes and displays two columns: No Digital Rights and Digital Rights.
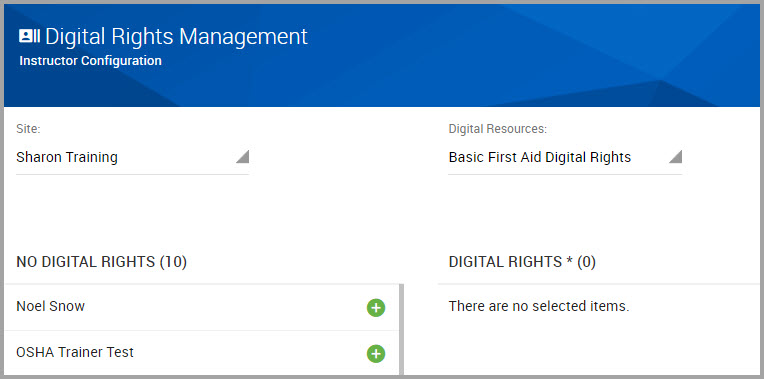
Step 3Find the instructor name beneath the NO DIGITAL RIGHTS column, and click the green icon to move their name to the DIGITAL RIGHTS column.
Step 4(Optional) Repeat Step 3 to provide digital rights for additional instructors.
Removing Digital Rights from an Instructor
Step 1Perform Steps 1 and 2 in Assigning Digital Rights to Instructors.
Step 2Once the window populates with names, find the instructor’s name beneath the DIGITAL RIGHTS column, and click the red icon shown next to the instructors name to move it beneath the NO DIGITAL RIGHTS column.
Affiliating an Instructor to your Training Center
Perform the following steps to move an instructor’s association from their current training center to your training center.
Note
-While the instructor is affiliated with your training center, you maintain responsibility for the instructor and are responsible for ensuring that they have access to and complies with current administrative guidelines as documented in the Training Center Administrative Manual (TCAM).
-Be sure to have the instructor’s registry number before you begin.
Step 1Choose INSTRUCTORS > INSTRUCTOR CHANGE OF AFFILIATION in the navigation pane.
Note Fields accompanied by an asterisk (*) requires input.
Step 2Enter the Instructor Registry Number* in the field shown in the Change of Affiliation window.
Step 3Click VALIDATE. The following message displays.
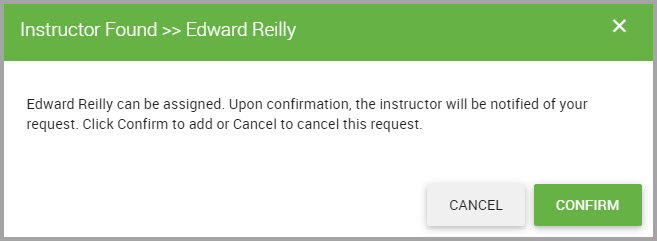
Step 4Click CONFIRM. A confirmation message displays.