Configuring & Managing System Settings
Main topics for this section includes:
Creating and Managing Administrator Roles
Creating and Managing Administrator Roles
Topics include:
Using the Administrator Roles Window
Creating and Managing Administrator Roles
Searching for an Administrator Role
Adding Features to an Administrator Role
Deleting Features From an Administrator Role
Editing an Administrator Role’s Name or Status
Deactivating an Administrator Role
Activating an Administrator Role
About Administrator Roles
Designate and manage your administrator's access to particular system tools by creating and assigning specific administrator roles to your administrator. For example, if you want an administrator to place orders for your site, you can create a Store role, add features to that role, and then assign the role to the administrator. You can limit or provide as much module access to an administrator as you wish.
Caution Ensure that at least one admin is positioned at the top of your hierarchy and is not assigned an admin role to assure their access to all system modules.
After creating the role, your next step is to add features to that role. Complete the process by assigning the role to an administrator, which is performed as you create or edit administrator details.
When an administrator is assigned a role, they only have access to the features which comprise that role. If an admin is not assigned a role, they can access any feature modules within the system.
Using the Administrator Roles Window
•Choose SETTINGS > ADMINISTRATOR ROLES from the navigation pane.
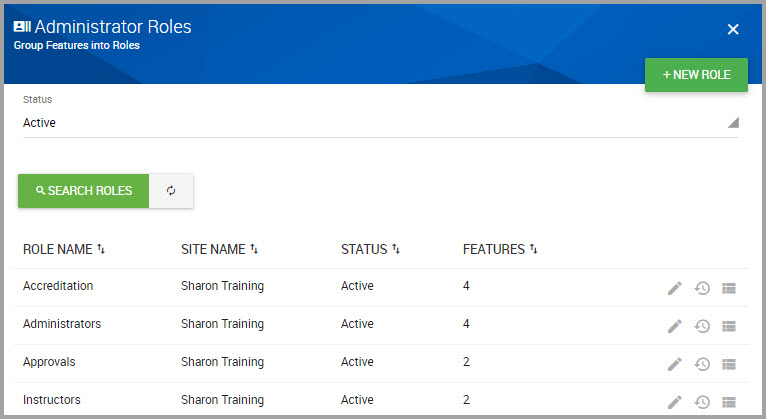
If administrator roles have been created, role names display in the lower portion of the window. For each role, the following icons display:
|
|
Click to invoke the Edit Role dialog box where you can revise the role name or its status. |
|
|
Click to view when a role was created and modified. |
|
|
Click to invoke the Feature List window where you can include or remove role modules. |
Creating an Administrator Role
Step 1Choose SETTINGS > ADMINISTRATOR ROLES from the navigation pane.
Step 2Click +NEW ROLE.
You must provide input for all fields accompanied with an asterisk (*) in the Add New Role dialog box.
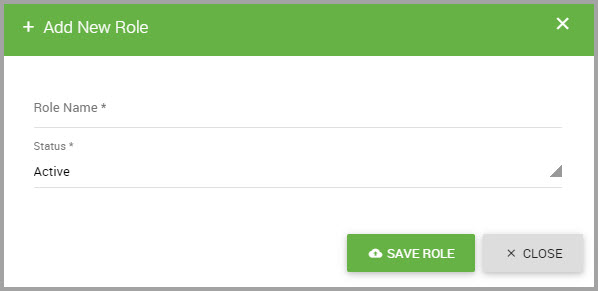
Step 3Enter a Role Name*. This name must be unique to the system.
Step 4Select the role’s Status*.
Step 5Click SAVE ROLE.
The role name now appears in the Administrative Role window.
Searching for an Administrator Role
Step 1Choose SETTINGS > ADMINISTRATOR ROLES from the navigation pane.
Step 2In the Administrator Roles window, select Status and make a selection from the drop-down menu.
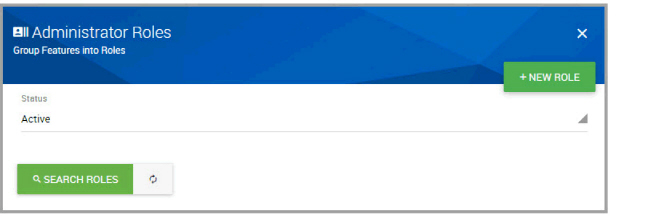
Step 3Click SEARCH ROLES.
Adding Features to an Administrator Role
Step 1Choose SETTINGS > ADMINISTRATOR ROLES from the navigation pane.
Step 2Find the Role Name that you want to add modules to. See Searching for an Administrator Role.
Step 3In the role’s row, click the Feature List icon.
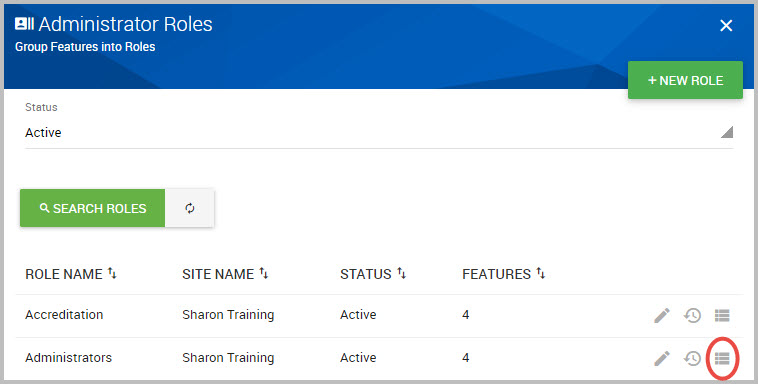
Step 4In the Manage Role Features window, Click +ADD FEATURES.
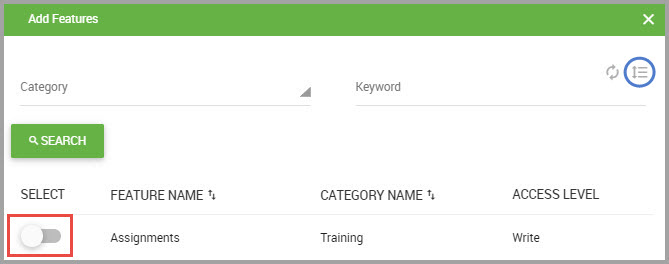
Step 5In the Add Features page, select the toggle for each module you want to include with this administrative role.
Note
With the Access Level Write, the user can view and edit elements within that feature module.
To view additional results per page, click the Results per Page icon, circled in blue in the image below, to choose how many results you want to see.
Step 6When you are done, scroll down the page and click SAVE FEATURES.
Step 7Click CLOSE to dismiss the page.
Deleting Features From an Administrator Role
Step 1Choose SETTINGS > ADMINISTRATOR ROLES from the navigation pane.
Step 2Find the Role Name that you want to add modules to, and in its row click the Feature List icon.
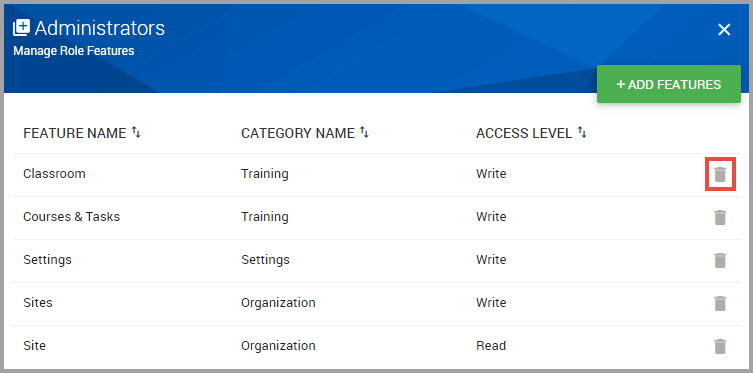
Step 3In the Manage Role Features window, find the feature module you want to remove from the role and in its row, click its trash icon.
Editing an Administrator Role’s Name or Status
Step 1Choose SETTINGS > ADMINISTRATOR ROLES from the navigation pane.
Step 2In the Administrator Roles page, locate the ROLE NAME and in its row click the Edit Role icon.
Step 3Revise the Role Name* or Status*.
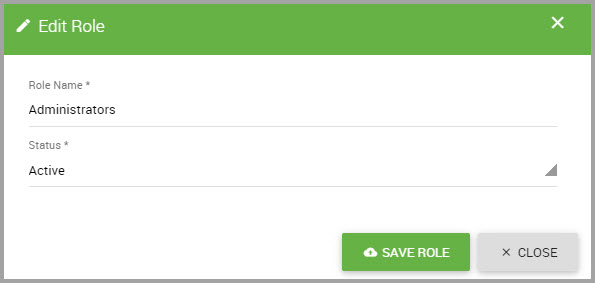
Step 4Click SAVE ROLE when you are finished.
Note To change the status of an administrator role, see either Deactivating an Administrator Role or Activating an Administrator Role.
Deactivating an Administrator Role
Step 1Choose SETTINGS > ADMINISTRATOR ROLES from the navigation pane.
Step 2Find the Role Name that you want to deactivate. See Searching for an Administrator Role.
Step 3In the role’s row, click its Edit Role icon.
Step 4In the Edit Role dialog, select Status* > Inactive.
Step 5Click SAVE ROLE.
Activating an Administrator Role
Step 1Choose SETTINGS > ADMINISTRATOR ROLES from the navigation pane.
Step 2Find the Role Name that you want to deactivate. See Searching for an Administrator Role.
Step 3In the role’s row, click its Edit Role icon.
Step 4In the Edit Role dialog, select Status* > Active.
Additional topics for the Settings module are publishing soon.